A KVM Setup That Just Works
I've finally achieved a desk KVM setup that just works. Getting there was surprisingly painful, so I wanted to share my final setup and some of the issues I ran into along the way.
The Problem
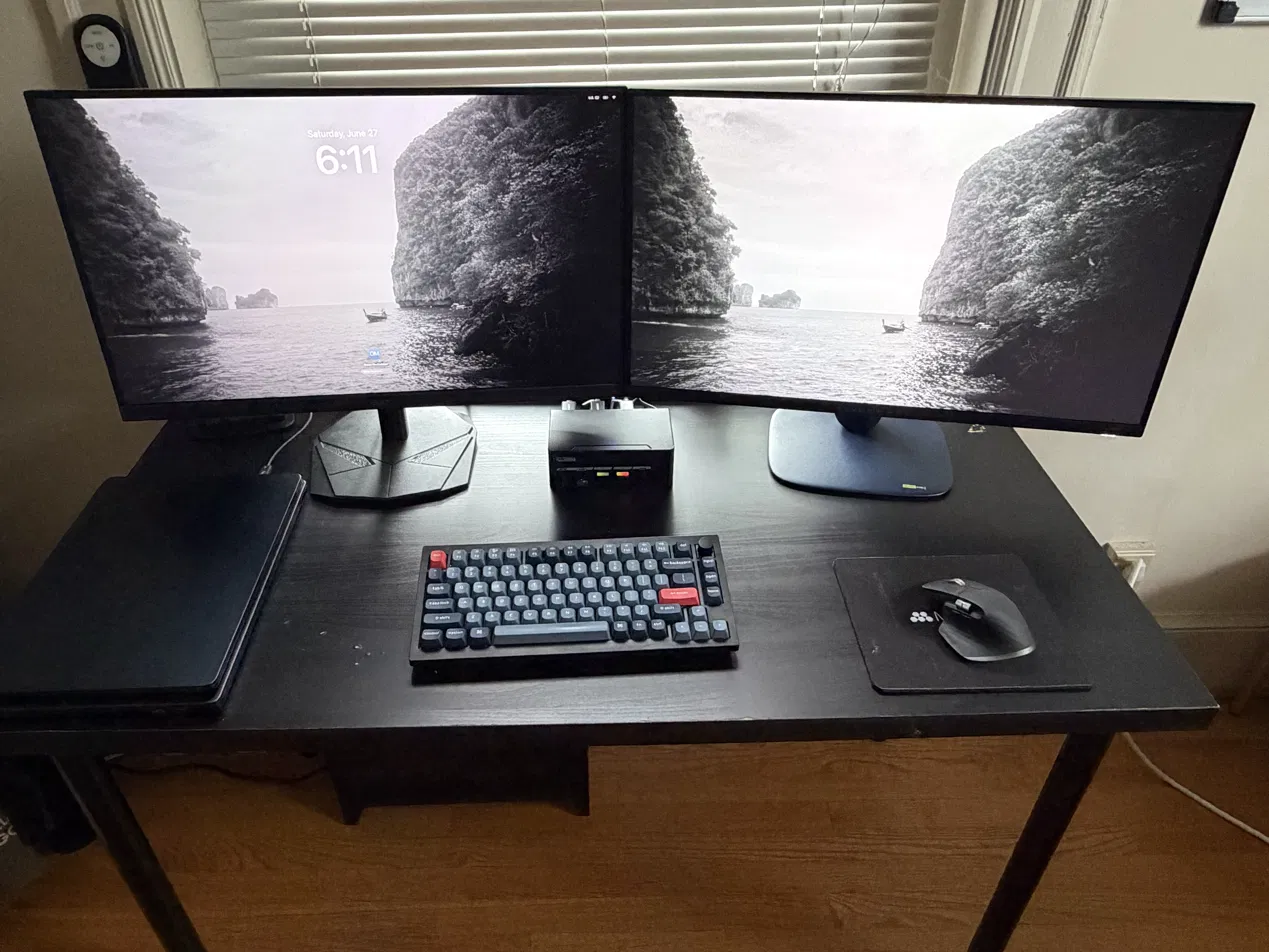
I have a desktop PC, a personal MacBook Air, and a work MacBook Pro. Switching devices at my desk used to mean manually toggling keyboard, mouse, and display inputs. That gets annoying fast.
A KVM switch solves this by letting you swap machines with a single button. The challenge was supporting two 1440p high-refresh-rate monitors while also switching my wireless keyboard and mouse dongles cleanly between machines.
The Setup
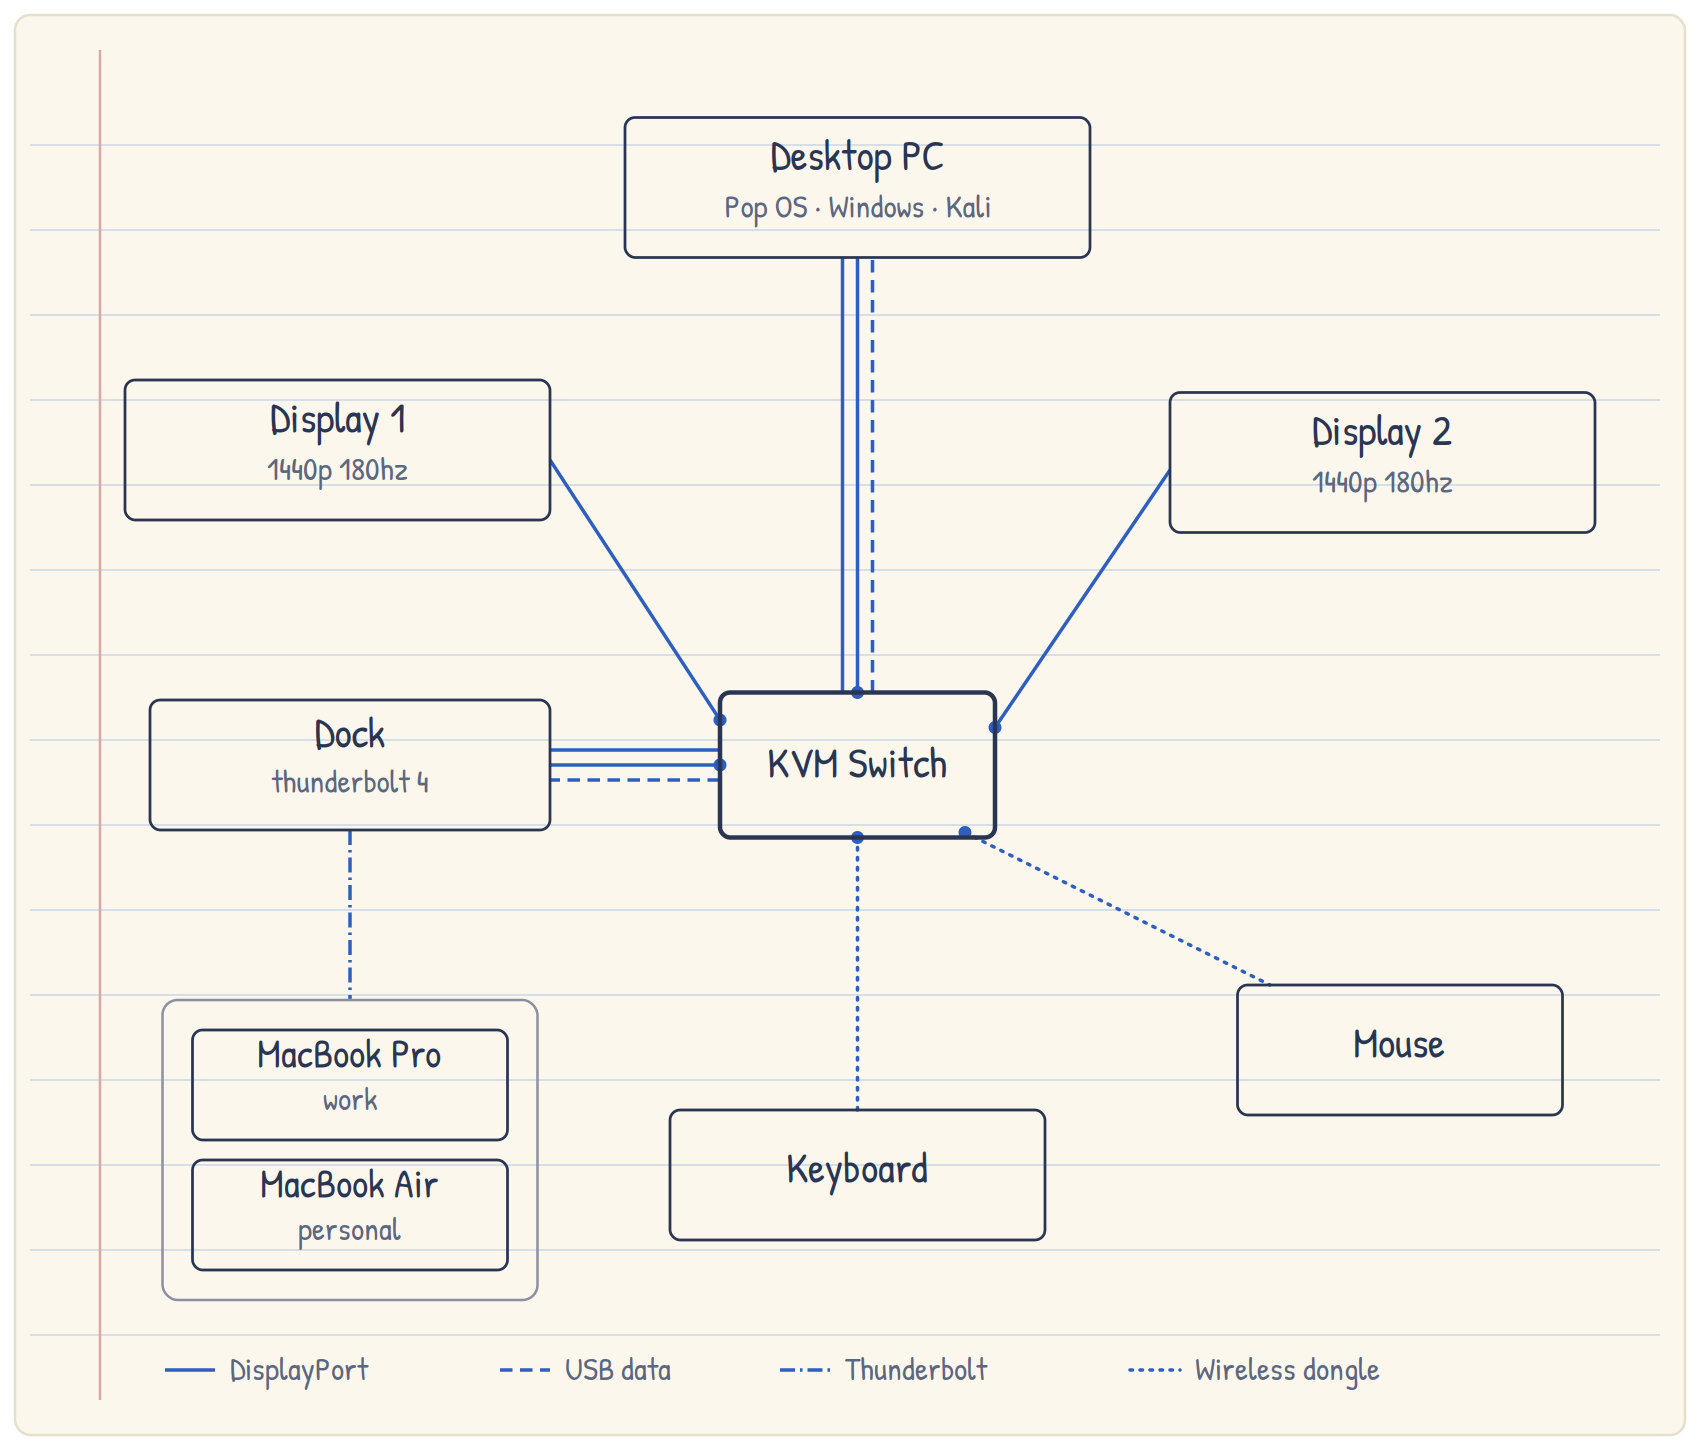
I landed on a KVM switch from Level1Techs paired with a Thunderbolt dock for the Macs. The KVM only sees two “computers”: my desktop PC directly, and whichever MacBook is connected to the Thunderbolt dock.
The Level1Techs KVM works great with the wireless USB dongles for my keyboard and mouse, and it lets me maintain high refresh rates on both monitors. The Thunderbolt dock gives the Mac side two DisplayPort outputs, which the KVM needs in order to drive both displays.
| Item | Quantity | Notes |
|---|---|---|
| Level1Techs Dual Monitor 2-Computer KVM Switch | 1 | Switches both displays and USB peripherals |
| Plugable 16-in-1 Thunderbolt 4 Dock | 1 | Provides two DisplayPort outputs, power, and USB connectivity for either MacBook |
| DisplayPort cable | 6 | Connects the PC and dock to the KVM, and the KVM to both monitors |
| USB-A to USB-B cable | 2 | Connects the PC and dock to the KVM for USB switching |
| Keychron V1 Max | 1 | Connected to the KVM using the wireless USB dongle |
| Logitech MX Master 3S | 1 | Connected to the KVM using the wireless USB dongle |
| Acer Nitro KGB271U 27" QHD 180Hz | 1 | Runs at 180Hz on the PC and 120Hz on the Macs |
| Alienware AW2725DM 27" QHD 180Hz | 1 | Runs at 180Hz |
First Attempt: A KVM without the K, V, or M
Before landing on this setup, I tried a KVM switch from TESmart with a Dell monitor that only had HDMI input. That setup had a few problems.
The biggest issue was display reliability. When I toggled the KVM, the Dell monitor would drop the signal entirely. The only way I could restore the display output was to unplug and re-plug the DisplayPort cable. My best guess is that the DisplayPort-to-HDMI adapter cable was the weak link.
The other issue was USB switching. The wireless USB dongles for my keyboard and mouse did not toggle with the KVM. Even when I connected my keyboard with a wired USB connection, it would not switch cleanly.
So in practice, I had a KVM switch without the K, V, or M.
I ended up returning it and going back to the drawing board. I also decided to replace the Dell monitor with another 1440p 180Hz DisplayPort monitor, both to match my Acer monitor and to remove the adapter cable from the setup entirely.
Minor Papercuts
The major issues went away with the Level1Techs KVM, but the final setup still had a few small quirks.
The first was a narrow vertical blue band on the right side of the Acer monitor when using either MacBook. I tried swapping DisplayPort cables, but that did not fix it. Since the issue only appeared on the Mac side, my best guess is that it has something to do with the dock. Lowering the Acer monitor from 180Hz to 120Hz cleared it up.
I also noticed that after toggling the KVM, the extra buttons on my Logitech MX Master 3S—like the forward and back buttons—sometimes stop working. If I toggle the input source on the mouse itself, the buttons start working again. It is not a dealbreaker, but it is a small papercut.
Finally, the KVM hotkeys only worked when my Keychron V1 Max was connected over wired USB. I normally use the keyboard wirelessly and do not mind pressing the physical button on the KVM, so this was not a big issue for me.
I found this Level1Techs forum thread useful while troubleshooting.
It Just Works
Overall, I have been very happy with the Level1Techs KVM. My biggest takeaway is that KVM setups can be surprisingly fragile, so it is worth investing in a high-quality switch and minimizing adapters, mismatched components, and other potential failure points.
It took more trial and error than I expected, but the KVM switch has turned a recurring manual annoyance into a small delight every time I use my desk.